A few days ago I posted a photo of what I consider the perfect boiled egg to my personal Facebook page and immediately got questions from friends on how I cooked it. I wrote up an explanation and before long the post had made it to a fitness group I belong to with even more commentary. So I figured … why not do a blog post about eggs.
I love boiled eggs. I eat them for breakfast, I eat them as snacks, I include them chopped in salads and soups or sliced in a sandwich. I love that they’re self contained and I can boil a dozen and stash them in the fridge to have handy at a moment’s notice.
What I don’t love is having to guess at how long to cook them. And trust me, I’ve tried every method under the sun and still wound up with over cooked, rubbery boiled eggs with that awful gray ring around the yolk. So a few years ago I ran an experiment. I tried all the methods. The steam method. The put them in boiling water then turn it off method. The put them in cold water and let it come to a boil method. The one that worked the best for me and got me where I wanted the fastest was the continual boil method.
So here’s how it went down and how I found my perfect egg (this is an abbreviated version because I only had 5 eggs in the house when I started this project this morning).
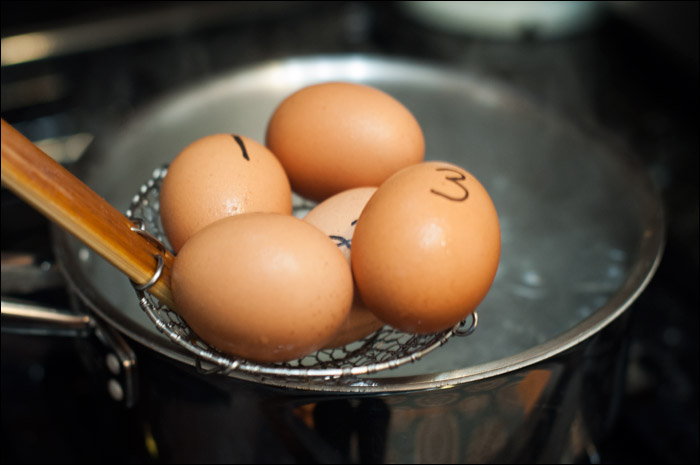
I used a Sharpie to number my eggs, 1 through 5:

I brought a large pot of water to a full boil and then I popped the eggs into my spider so I could lower them into the boiling water:

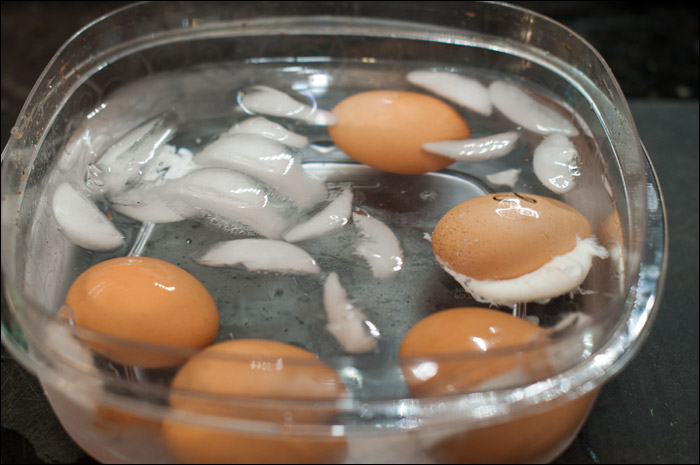
I set the timer and at the 5 minute mark I removed Egg #1. At 6 mins, Egg #2, etc. They went straight from the pot into a small container of iced water.
Once they were all out of the pot, I peeled and photographed.
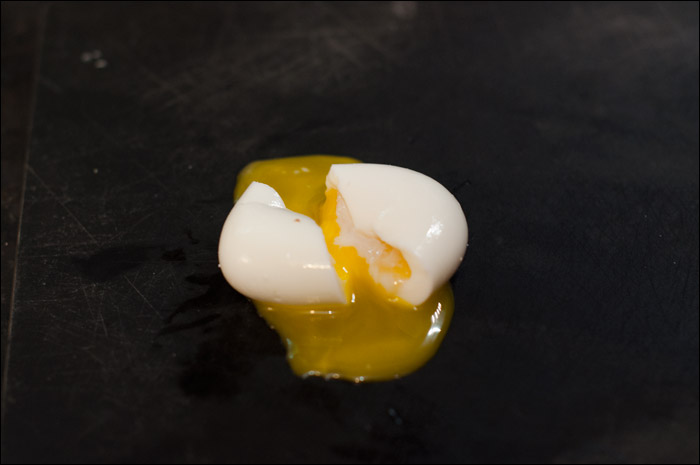
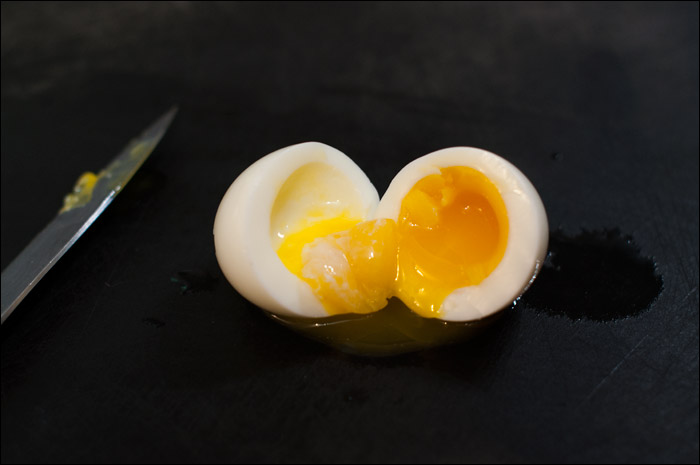
This is Egg #1 – 5 minutes. You can see it’s got both a little bit of runny white and a completely liquid yolk. This egg was so soft that after I removed the shell and set it on the cutting board it pretty much collapsed under it’s own weight. I didn’t even have to cut into it – it just split right down the middle. This, to me, is the perfect egg for adding to ramen. The heat of the soup will continue to cook the egg a little, but you can swirl the liquid yolk all through the broth.
Egg #2 – 6 minutes. This one is a little bit of a disappointment as the egg cracked while cooking and so is actually more cooked than it should be. It skews the results. (This will happen once in a while when you set cold eggs in boiling water. It’s still edible, it’ll just be a little over cooked for the timing.) The white was still soft and only sort of holds it’s shape. but you can see part of the yolk is starting to solidify while part is still liquid and runny.
Somewhere between Egg #1 & #2 are the eggs you’d want to use if you’re going to have a traditional soft boiled egg in an egg cup – cut the top off and dip fingers of toast in or just use a spoon.
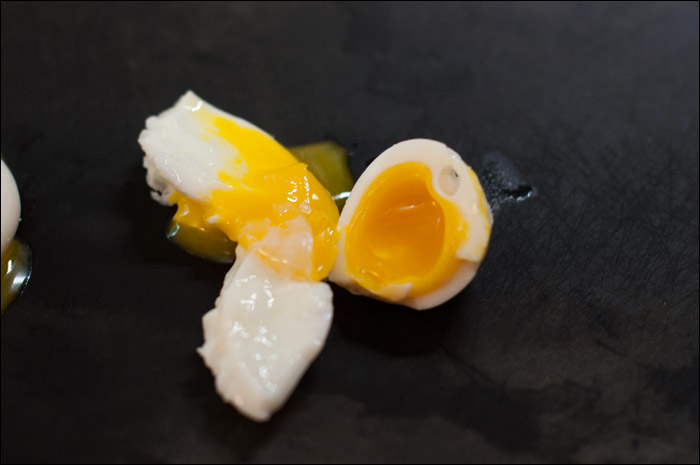
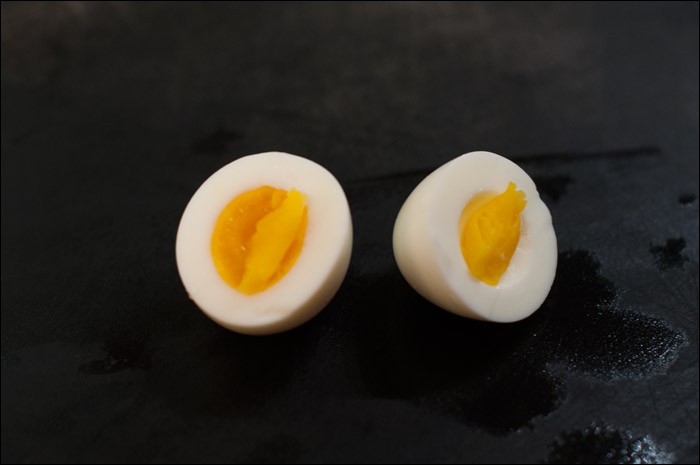
Egg #3 – 7 minutes. This egg white is completely firm and holds it’s shape cleanly when cut. You can see the ring of solid yolk with a little bit of thick runny yellow right in the center. This, to me is the perfect toast egg – cut it in half lengthwise and smush it down on a piece of toast. Sprinkle with salt and pepper. Yum!
Egg #4 – 8 minutes. The whites are solid and hold their shape but not rubbery and the yolk is solid all the way through, but still soft and creamy, not crumbly. This is the egg I make most of the time. This is *my* perfect boiled egg for just sprinkling with a little salt and pepper and eating.
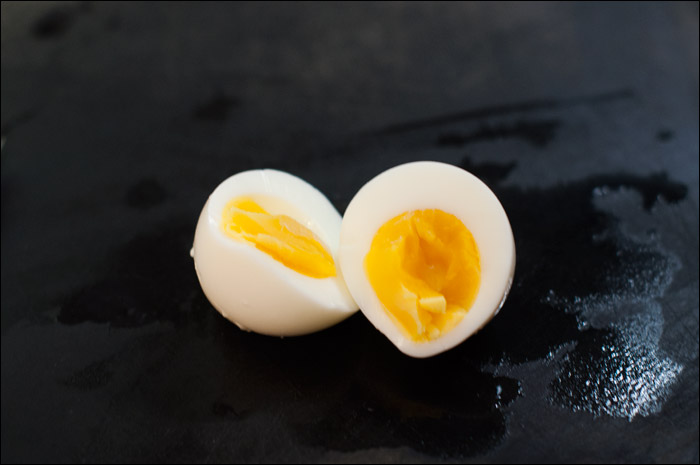
Egg #5 – 9 minutes. As with Egg #4, this egg has a solid white that holds it’s shape well. The yolk is solid all the way through and you can see it’s beginning to break apart in chunks rather than being creamy. It’s still a good egg, not overcooked at all, just a little less creamy in the center. I’d take either #4 or #5 without hesitation.
Had I had more eggs to continue, you’d have seen that at around 10 mins, the yolk starts to get more crumbly. At any length of time after that you’re starting to get into overcooked territory. The whites move past firm and into rubbery and the yolks are chalky and dry.
I make 9-10 min eggs if I’m going to make egg salad or if I want eggs to dice to go into potato salad but never longer than 10 mins.
Two caveats to this: I usually cook 4-6 eggs at a time. If you do 10 or a dozen at a time, add one minute to the above times. The more cold eggs you add, the longer it takes the water to come back to a full boil so you have to adjust accordingly. Also I’m in Atlanta so pretty close to sea level. If you’re in the mountains, realize that you’ll probably need to add more time to compensate for a lower boiling point. But I hope that at least these photos have given you a starting point to work with as you experiment to find your own perfect boiled egg!